Adding a location
Two ways to add a site to your portfolio, and what to set when you do.
Method 1: Drop a Pin Anywhere on the Map
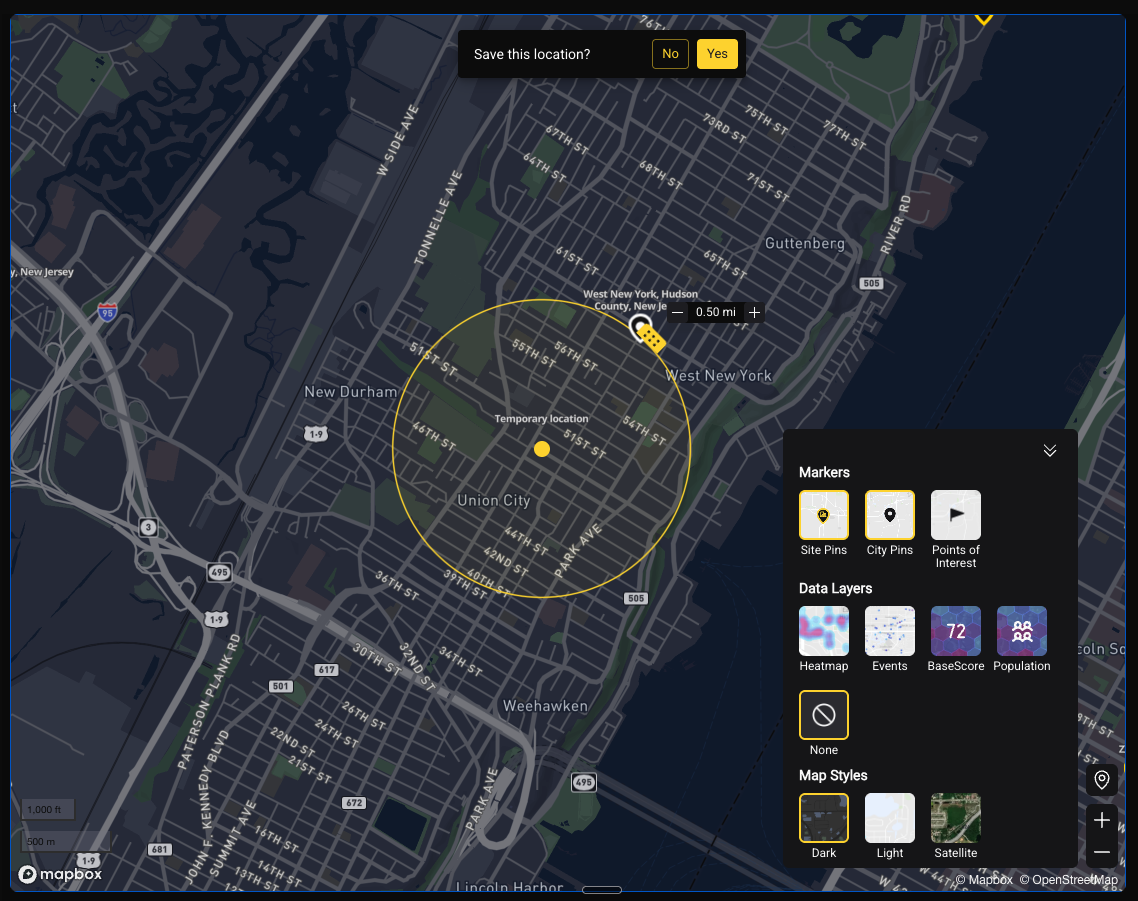
Click anywhere on the map to drop a pin at that coordinate. A prompt will appear to save the location. You don't need an address — any lat/long point on the map works.
Method 2: Search, Then Save
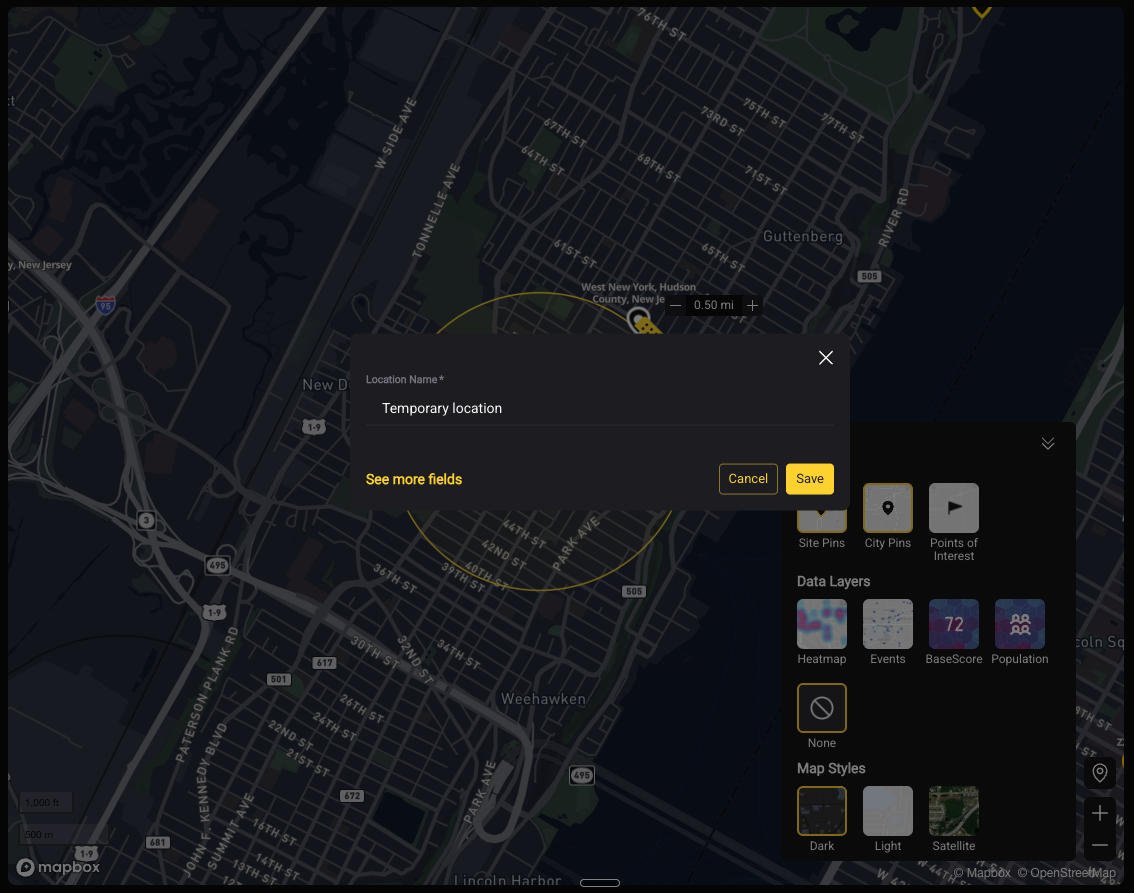
Search for an address or location name using the search bar (see Section 2). Once the location loads and you've confirmed it's the right place, click Save Location to add it to your portfolio.
Location Setup Options
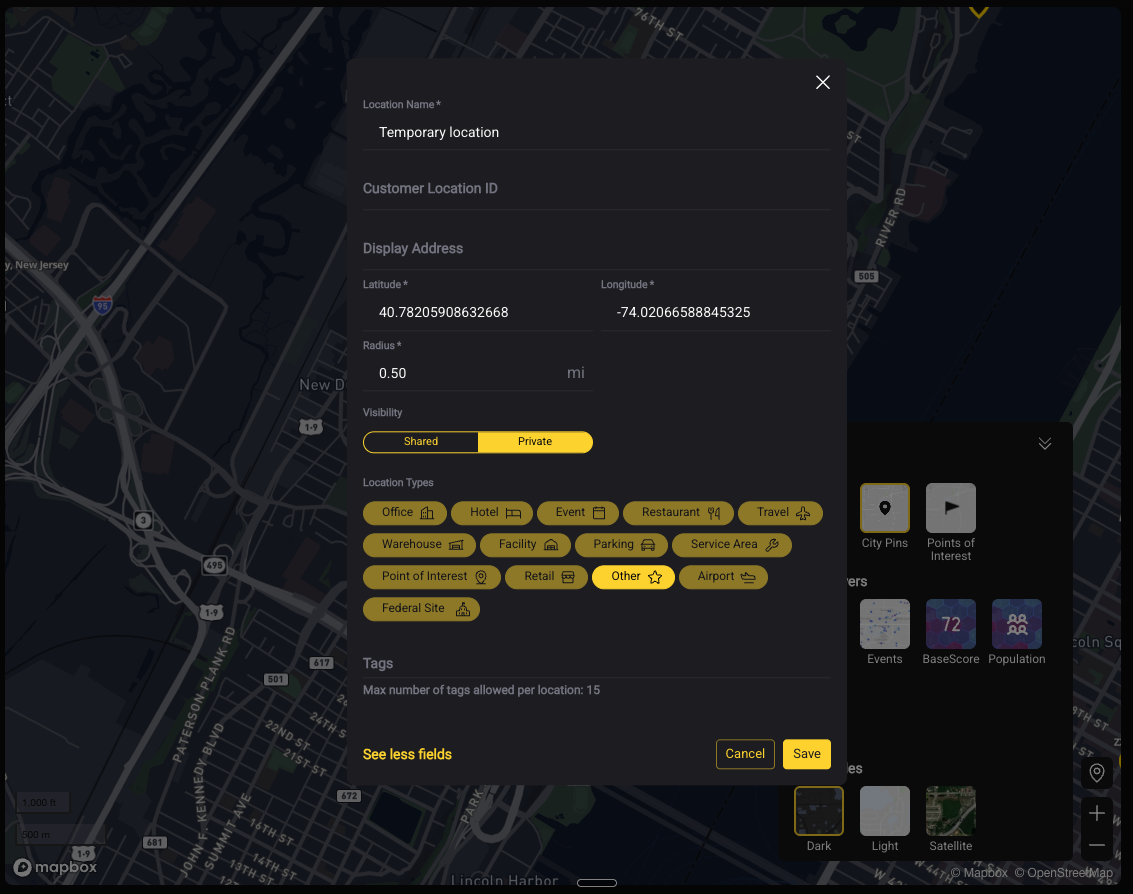
When saving a location, you'll configure the following:
Name — give the location a clear, recognizable name (e.g., "Chicago HQ," "Austin Warehouse 3"). This is what appears in your dashboard and reports.
Location Type — select the category that best describes the site (e.g., office, warehouse, retail, hotel, event venue). This helps with filtering and organization in your dashboard.
Radius — set the analysis radius for this location. This becomes the default radius each time you open it. See Section 2 for guidance on radius selection.
Tags — apply one or more tags to group and filter locations in your dashboard (e.g., "Texas," "Tier 1," "Watch List," "Q3 Expansion"). You can add multiple tags to a single location.
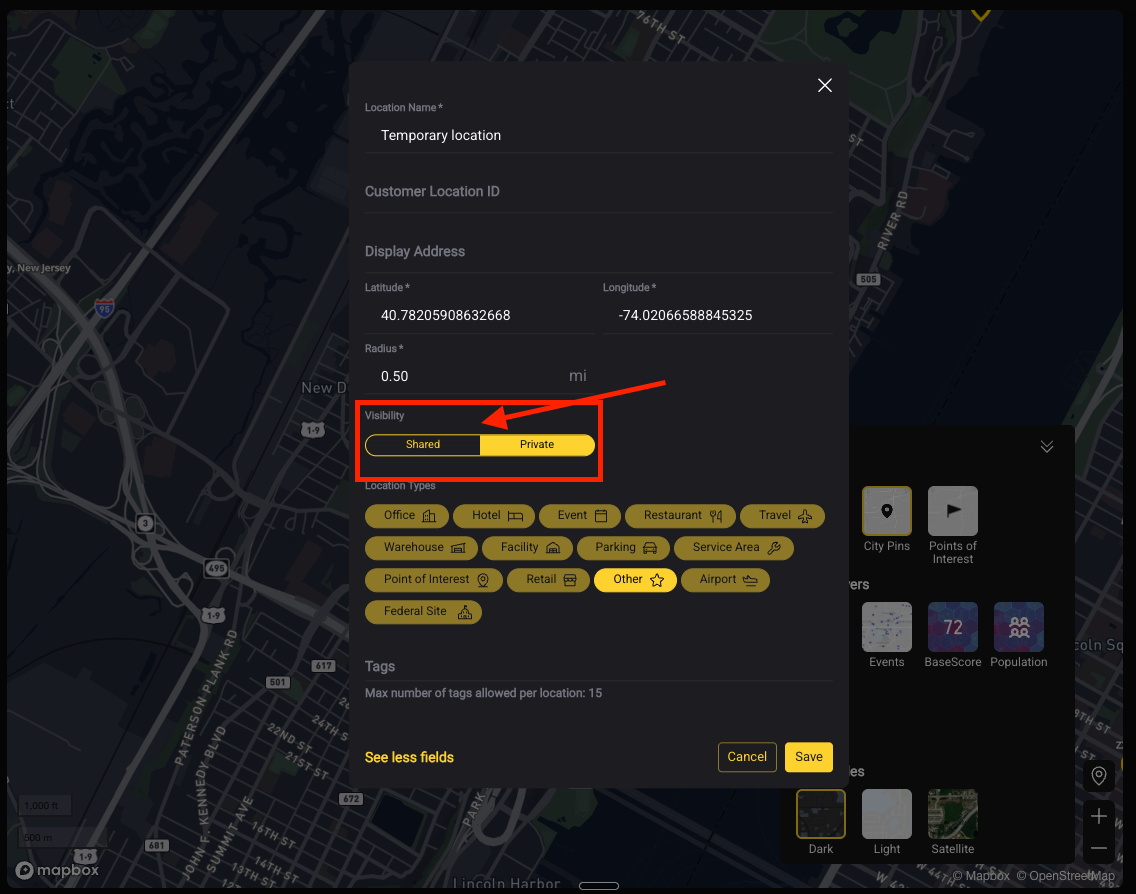
Private vs. Shared Locations
When saving, you'll see an option to set the location as Private or Shared:
- Private — visible only to you within your account
- Shared — visible to all users in your organization's Base Operations account
Use shared locations for sites your whole team needs to monitor. Use private locations for exploratory research or draft assessments you're not ready to share.